Wednesday, December 30, 2009

Welcome 2010

I've never really bothered to make a New Year's resolution let alone keep one. This year however, I have two.
  1. Find a job in San Francisco and move there
  2. Heal the stress fracture in my leg and run a half marathon fall 2010
A few days ago, I came across Project 365, on Hannah's blog. (If you haven't been following it you should check it out, her photography is fantastic). Years that are filled with change, as 2010 is sure to be, always seem to go by so quickly and this just seemed like the perfect way to be able to slow down, notice the little things and maybe even remember them at the end of the year. Not to mention a great way to improve my less-than-stellar photography skills. Once I figure out how to organize it (flickr, photoblog etc) I'll post a link so my legions of fans (HA! that's a joke) can follow along. A couple friends are doing it with me so hopefully that will keep me from giving up too early on. First photo to come later today.

In the meantime, I had a New Year's Eve Party at my house last night followed by a wonderful New Year's Day brunch this morning. Recipes and pictures of both to come in the next few days.

Happy New Year!

Tuesday, December 29, 2009

Some Pictures from the Past Week


My favorite pillow/chair at my Mom's Apartment

Some extra extra large icicles hanging over my back door, (don't worry I knocked them down after I took this so they don't fall and impale someone).


Friends in Rockerfeller Center
Friends at Tony di Napoli on 83rd (delicious family style italian)


Sandwich Cookies


In years past I used to always bring these to my friend Katie's ski house when we went to Vermont for Christmas vacation. It became my tradition during high school but with us all almost graduated from college now, we haven't been to Vermont together since Spring of 2006. I recently realized I haven't made these since the last Christmas we spent in Vermont. (That was 2005!)


My friend Cathy and I decided to throw a New Years Eve party at my house (all the way up in Binghamton), so I thought this would be as good a time as any to bring my favorite cookies back to life.
They are pretty simple but they do take a bit of time since it takes a few steps. The cookie itself is just a simple butter cookie recipe from Martha Stewart but you will need a cookie press to make them. I have this one from Williams-Sonoma for a couple years now and it works great.
Sandwich Cookies
It's not impossible to make these with a electric hand mixer but it will certainly make your life easier if you have a stand mixer (I made the cookies at my mom's so we used hers but I got one of my very own for Christmas!!).
I used only white flour for this dough because it is a very delicate cookie. One day I will probably try white ww flour or even ww pastry but I'm not sure how it will react. I did however use pure cane sugar instead of white with no trouble at all.
I filled these with apricot and raspberry jams but I also think black raspberry or black or red currant would be great. Just make sure the jam you choose is seedless and smooth with no fruit chunks otherwise the cookies won't fit together nicely. Melted dark chocolate would be another way to go.
Makes about 30 sandwiches.

1 1/2 cups (3 sticks) unsalted organic butter
1 cup organic pure cane sugar
2 large organic egg yolks
3 3/4 cups all-purpose flour
1/4 teaspoon salt
1 tablespoon pure vanilla extract

Jam or melted chocolate for sandwich filling.

Good quality, fair trade, organic very dark chocolate for dipping or drizzling over sandwiches

For the cookie:
Heat oven to 350 degrees. using your stand or electric hand mixer, cream butter and sugar until light and fluffy. Add egg yolks, flour, salt, and vanilla. Mix thoroughly.

Select the desired shape disk for your press. I use the one that looks like a flower.
Fill a cookie press with the dough, and turn out cookies unbuttered baking sheet. You can put them pretty close since they don't really spread. This may take a little getting used to but its easy once you get it. Make sure you pack the dough in tightly to push the air pockets out otherwise you won't get full cookies. Each time you fill the press, click the lever about 3 times to compress the dough. The first cookie usually doesn't come out so pretty so if its ugly just scoop it up and throw it back in the bowl of dough.

Bake until the cookies are lightly golden color, 7 to 10 minutes. They don't get very dark you just want to take the edge off that whiteness. If your oven bakes unevenly, rotate sheet halfway through the baking process. Transfer to a wire rack, and let cool.

Make sandwiches:
Once cookies have cooled, spread a small amount of jam on the bottom of one cookie, match up the bottom of another cookie and press together into a sandwich. Repeat until all cookies are used up.

Line up cookies close to each other on parchment paper. Melt chocolate and drizzle on top of cookies.
To read about melting chocolate click here and scroll to the * towards the bottom.

These cookies are best when make a couple days in advance because the jam will set properly. Just make sure to keep them in an airtight container. They also make great gifts :)

Monday, December 28, 2009

Egg "Fritatta" Pitas


I had lunch with my mom today followed by a few hours of baking sandwich cookies. More to come on those later but first our delicious egg pitas. Every day she's been telling me about how she pours beaten eggs into a small pot and it rises like souffle so finally today I watched her make egg "fritattas" and we had them in pitas with lots of greens. She used 1 egg and 1 egg white per person and made them individually in a small pot with just a bit of oil. They were delicious but, I don't eat whole eggs too often because of the cholesterol so next time I think I will try making it with just egg whites or maybe 2 egg whites and just half a yolk. But then what do I do with half an egg yolk? I hate wasting food. Anyway, this is super simple I'm not sure I can even call it a recipe.

Mom's Egg "Fritatta" Pitas
Serves 2.

2 Eggs
2 Egg whites
olive oil
salt and pepper to taste

2 Whole wheat pitas
Arugula, baby spinach or mixed greens

Dijon mustard (optional)
Balsamic vinegar (optional)

Heat a small pot with a thin layer of olive oil on medium heat
Beat 1 egg and 1 egg white in a small bowl with salt and pepper until combined
Pour beaten eggs into the pot and cover immediately. As the eggs cook they will rise sort of like a souffle. (It helps if you have a cover made of glass so you can see it rise..if not, no worries just check it in a few minutes.) The eggs will rise to about double their original height and should be set.
Remove the cover and pull the egg up with a spatula. Slide it into the pita pocket and stuff with greens.
I also blended a little balsamic vinegar with dijon mustard, spread it on the inside and had a Compari tomato on the side.

Repeat with the other eggs and pita. Enjoy!


Saturday, December 26, 2009

Fresh Ricotta Cheese

A couple weeks ago I took a trip to the New Amsterdam Market in South Street Seaport and had the most amazing fresh homemade ricotta cheese. Of course it was full fat (100% whole milk or maybe even partly cream). It was smooth rich and delicious with no rubbery texture like those store bought brands full of various gums..xantham, guar, carageenan etc. For a couple weeks I though about how easy it probably was to make my own ricotta. Then one day I came across cheesecloth in Williams-Sonoma and finally decided to give it a try.

Everything I read advised against using anything but full fat milk or cream, and I usually like to try a recipe before I alter it. I just really didn't know what I would do with 2 cups of full-fat ricotta cheese, so I tried part-skim on my first attempt. It came out alright. A little bit dry and the texture wasn't as creamy but I think that has less to do with the skim milk and more to do with the length of time I let it drain (probably around 5 minutes too long).

Fresh Part-Skim Ricotta
Feel free to make this with all whole milk or even substitute part of it for cream
Makes about 2 cups.

1/2 Gallon Whole Milk
1/2 Gallon Skim Milk
5-6 Tbls distilled white vinegar
3 tsp salt (2 if using it in a dessert)

Candy Thermometer
Cheesecloth

Combine both milks into a large nonreactive saucepan over medium high heat, preferably a thick-bottomed pan if you have one. You will need to stir occasionally, scraping the pan bottom, to avoid scorching.
Once the milk is hot, stop stirring. You will start to see curds rise and come to the surface. Run a spoon or spatula along the bottom of the pan occasionally to free up any stuck curds.

While the milk is heating, Line a colander with a large piece of cheesecloth that has been folded numerous times - until you have about 5 or six layers.
Place the lined colander over a large bowl or sink.
When the mixture reaches about 175F degrees, you will see the curds and whey seperate. The curds are the clumpy white mass.
Now, remove the pan from heat, and gently begin to ladle curds into the prepared sieve.
Pull up on the sides of the cheesecloth to drain off any extra liquid, but resist pressing on the curds. Gather the edges of the cloth, tie or fasten them into a knot and allow them to drain for about 10 minutes (I drained mine for about 15 and that was definitely too long).

I had to rig up a way to have it hang over the sink (cheesecloth tied to a wooden spoon. the detergent was nearby and I needed something heavy to hold the spoon there)

Enjoy immediately or refrigerate in a sealed container for a few days.

Friday, December 25, 2009

Merry Christmas!

There's snow outside! As far as I can remember this is first white Christmas on Long Island in quite a while. Hope it's snowy where you are!

Wednesday, December 23, 2009

Snow on Long Island? That's So '90s


Growing up we always had at least one decent size snowstorm a year but no more. Now it's a big deal if we get more than a couple inches once or twice a winter. I LOVE snow (at least until sometime in February when I start getting pretty sick of it), so you can imagine how excited I was for the "blizzard" we got last weekend. 1 whole foot of snow! Wait...since when is a blizzard only a foot? What happened to the 5 foot snow drifts that used to block my front door? Oh, global warming what have you done?


Monday, December 21, 2009

Viktorija's Santa Cookies


These are probably the most delicious chewy bar cookie I've ever eaten despite the fact that they are super sweet and decadent (not usually my thing). Viktorija made these for our Christmas party and then a couple times since and they are just so good we can't stop eating them.

Viktorija's Santa Cookies
Also known as 7 layer cookies, this is Viktorija's family recipe. She leaves these out for Santa on Christmas Eve (and carrots for Rudolph). The measurements for the chips and coconut are approximate and can be altered however you like (more peanut butter, less butterscotch etc). Just make sure to use enough coconut to cover otherwise the tops of the bars will burn.

1 1/2 cups graham cracker (crushed into crumbs with a food processor)
7tbls unsalted butter, melted
1/2 cup fair trade, organic dark chocolate chips
1/2 cup all natural peanut butter chips (Many stores carry Sunspire brand)
1/2 cup butterscotch chips
1/2 cup chopped walnuts
1.5 cans organic sweetened condensed milk
1 1/2 cups sweetened flaked coconut

Preheat the oven to 350.
Place butter in a 9x13 baking pan (glass pan works too) and put it in the oven just until melted. Take the pan out of the oven and add the crushed graham crackers pressing down with a spoon or spatula to compress. Pour the condensed milk in an even layer over the butter and grahams.
In layers, sprinkle the chocolate chips, peanut butter chips, butterscotch chips, and walnuts. Press down with a spatula.
Sprinkle the coconut evenly across the top and press down lightly.
Bake until the coconut is golden (about 30 minutes), let cool and cut into squares.


Thursday, December 17, 2009

Homemade Salted Caramels


I was browsing recipes one morning thinking about how to use up the heavy cream that I had at home when I came across this recipe for Salted Caramels. I love the idea of chewy homemade caramels free of High Fructose Corn Syrup and nasty preservatives plus I had all the ingredients at home.

Homemade Salted Caramels
This is a combination of recipes from Martha Stewart and Gourmet and originally called for corn syrup which I replaced with mild agave nectar with no problems. I also taped my parchment paper to the glass dish to keep it in place which made my life a whole lot easier. They came out soft chewy and delicious and they wrapped up so nicely in parchment paper. Adding a little vanilla probably wouldn't hurt either. Makes about 45 little candies but you can easily double it..I tripled it and then made one more batch to have plenty to give you.
Adapted from Sarah at The Domestic District

1 cup heavy cream
5 tablespoons unsalted butter, cut into pieces
1 teaspoon fleur de sel
1 1/2 cups sugar
1/4 cup light agave syrup (also works with half agave half honey but you will taste the honey just a bit)
1/4 cup water
Line an 8×8″ glass baking dish with parchment and grease really well with butter.

Bring cream, butter and salt to a boil in a small saucepan. Remove from heat and set aside.

In a medium saucepan, bring sugar, agave and water to a boil, stirring just until the sugar is dissolved. Then continue boiling without stirring until the mixture is a light golden color and a candy thermometer reaches 250 degrees. Don’t worry how long this takes – some recipes say it takes 10 minutes and others say up to 45 minutes. The important thing is that it reaches 250 degrees and is a light golden caramel color.

When this happens, carefully stir in the butter/cream mixture. The caramel will bubble up, so be careful. Stir constantly and continue to cook until the mixture reaches 248 degrees.

Then pour into the prepared baking dish and let cool at least 2 hours (LF note: I probably let it go more like 3 or 4. It's easier to slice that way). Sprinkle the top of the caramels with a generous amount of nice sea salt. When the mixture has set, cut into pieces and wrap in parchment paper. (LF note: try to to handle the caramels to much when cutting a wrapping since the body heat from your hands will soften them).

Wednesday, December 16, 2009

A Walk in the Woods


Thought I would share a few pictures from my walk today. Binghamton University has the largest piece of protected land of any university. It was about 23 degrees but it was sunny and I hardly noticed the chill.


Lemon Yogurt Cake

Simple. Delicious. Try not to eat the batter with a spoon--it will be a struggle.

Lemon Yogurt Cake
Adapted from A Homemade Life by Molly Wizenburg (of Orangette). Serves 9
Cake
1-1/2 cups unbleached all-purpose flour
2 tsp baking powder
pinch of salt

zest of two lemons
1/2 cup fat-free plain yogurt (I used stony field farm because I had it home)
1 cup sugar
3 large eggs
1/2 cup light tasting olive oil

Syrup
1/4 cup powdered sugar, sifted
1/4 cup lemon juice

Glaze
1 cup powdered sugar, sifted
3 tbsp lemon juice

Preheat oven to 350
Grease 9-inch round cake pan (or in my case, the heart pan my Mom gave me a couple years back) with organic olive oil spray (I really hate to use cooking spray and such but I just haven't weaned myself off its convenience, not yet anyway).
In a medium bowl, whisk together the flour, baking powder and salt.
In a large bowl, combine the yogurt, sugar, lemon zest and eggs, stirring to mix well. Add the flour mixture and stir to just combine. Add the oil and stir well.
Pour into the prepared pan and bake for 25-35 minutes, until cake tester inserted in the middle comes out clean.
Cool the cake in the pan on a wire rack for 15 minutes. Run a knife around the edge of the pan and invert onto wire rack.
Flip back over so that rounded top is up. Set the rack over a pan or large plate.
In a small bowl, whisk together the syrup ingredients and spoon the syrup slowly over top of warm cake.
Let cake cool completely.
In a small bowl, combine the glaze ingredients. Whisk well so that sugar is completely dissolved. Spoon the icing over the cooled cake.
Cake can be served immediately, but glaze will be set after about 1 hour.

Tuesday, December 15, 2009

Sugared Cranberries


I was browsing my usual blogs this morning over coffee and thinking about what to do with all the food in my fridge before I leave for Long Island Friday. Just as I remembered the cranberries hiding in there I came across this recipe on Heidi's 101cookbooks. Right then I knew that's exactly what I was going to make and into the kitchen I went.

Sugared Cranberries
Adapted from 101cookbooks. Makes 2 cups.

2 cups cranberries, picked over
2 cups water
2 cups pure cane or turbinado sugar
Pure cane or turbinado sugar for first coating
White sugar for second coating

Place the cranberries in a medium glass bowl and set aside.
Make a simple syrup by bringing the water and sugar just to a simmer in a medium saucepan.

Let the syrup cool for a couple minutes and then pour it over the cranberries. If the syrup is too hot the cranberries will burst, so be careful. Cover and refrigerate overnight.

The next day, drain the cranberries and toss them with larger grained sugar until they are well coated. Use only a scoop of sugar at a time, and small batches of cranberries, so the sugar doesn't get too damp. Place the coated cranberries on a baking sheet to dry for a few hours.
Do a second toss with the regular granulated sugar, this typically takes care of any sticky spots on the cranberries. Let dry another hour.


Pumpkin Cranberry Bran Muffins


Not your average bran muffin, moist, with a slight tangy tartness from the cranberries and a bit sticky from the molasses. Great on a relaxing morning a little peanut butter and hot cup of tea.


Pumpkin Cranberry Bran Muffins
Adapted from Craving Greens. Makes 12 muffins.

1 cup organic pumpkin purée
(I like to make my own but I had a can at home and wanted to use it up)
3/4 cup wheat bran
2 eggs
3/4 cup skim milk
1/3 cup molasses
1/3 cup natural cane sugar
1 tsp freshly grated ginger

1-1/4 cups whole wheat pastry flour
2 tsp baking powder
1/2 tsp baking soda
2 tsp cinnamon
1/2 tsp nutmeg
1/4 tsp ground cloves
1-1/2 cups fresh cranberries

Preheat oven to 400°F.
In large mixing bowl, combine pumpkin purée, wheat bran, eggs, buttermilk, molasses, sucanat or cane sugar, and grated ginger. Whisk together.

In separate bowl, mix flour, baking powder, baking soda, cinnamon, nutmeg and cloves.

Stir dry ingredients into wet, mixing well. Add cranberries to mixture and stir.
Line a muffin pan with paper muffin cups* or grease a non-stick pan, (the pumpkin replaces the fat in this recipe so even a non-stick pan will end up with muffins cemented to it). Divide batter evenly among cups and bake for 20-22 minutes or until cake tester comes out clean and tops are golden.


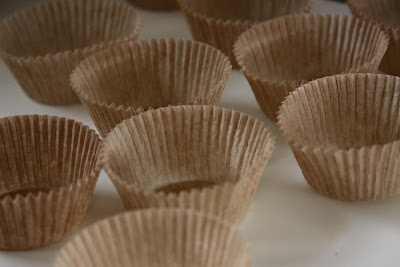
*I love the If You Care muffin cups. They are unbleached, made from 100% recycled paper and compostable.


Live Activity Feed