Showing posts with label Cookies. Show all posts

Saturday, September 4, 2010

The trouble with writing a food blog...

If I offered you a large chocolate chip cookie last week, you might assume that was a generous thing to do; share. Typically I am happy to do it and I'd like to think it's driven by generosity. But Thursday, well Thursday might have been a little different. As much as I'd like to think my cookie-sharing is prompted by my desire to share cookies with others, I think in this case I think it was a survival tactic. By offering these cookies to others I was actually begging people to save me from eating them all myself. Maybe I'm not as generous as I once thought, but really, what do you care; I'm still giving you cookies. Even if it was really for selfish reasons.
You see, the trouble (and sometimes benefit) with writing a food blog is that when I set up a shot, the food sometimes looks so good that I end up eating it even if I originally intended to just photograph it and put it away. Such was the case at around 11am Thursday morning when I made chocolate chip cookies. Not just any cookies but Leite's Conssumate Cookies. They are HUGE (I'm talking City-Bakery size huge) by nature because that's the idea behind the 3 rings of a chocolate chip cookie; Crispy around the edges, soft in the middle and chewy in between. So yes, it was necessary to make them that large. Anyway I had already decided I would save one for myself and one for my Dad (the only other chocolate chip cookie eater in my family) and give the rest to my friends that evening. I would photograph my own cookie so that I could break it apart, take a bite, dunk it in milk or whatever and then wrap it up to eat as a snack later in the afternoon. I should really know better by now. By the time I poured a glass of milk and broke the cookie in half, there was no going back. I don't know what came over me but something even possessed me to dunk it in the milk - which I've never done before in my life. I had really just poured it for a prop to set a scene for the photograph but you know what? Now I totally understand why people dunk cookies in milk. It's delicious! These cookies might have even turned me into a milk drinker yet!
Now, I know that every time I make a new chocolate chip cookie, I declare it my favorite (well, except for the little zucchini mishap). For one reason or another the new one is always better than the previous favorite. I often read that others do the same and I think it's not so much that we've replaced our old favorites; but rather this one suits us better for right now. In this moment in time this cookie or cake or whatever is the best one for us.


That doesn't mean we won't return to our previous favorites sometime. After all, a chocolate chip cookie with shredded coconut in it is different than a City-Bakery sized cookie made with chocolate disks. But for right now, in this moment, this is the best chocolate chip cookie. I will warn you though, these cookies are dangerous. I had every intention of keeping only one for myself, but as I packed them up I realized I just couldn't part with them all and stashed away one more for myself. That extra cookie never made it to the light of Friday and was proof that I can't be trusted with these cookies.
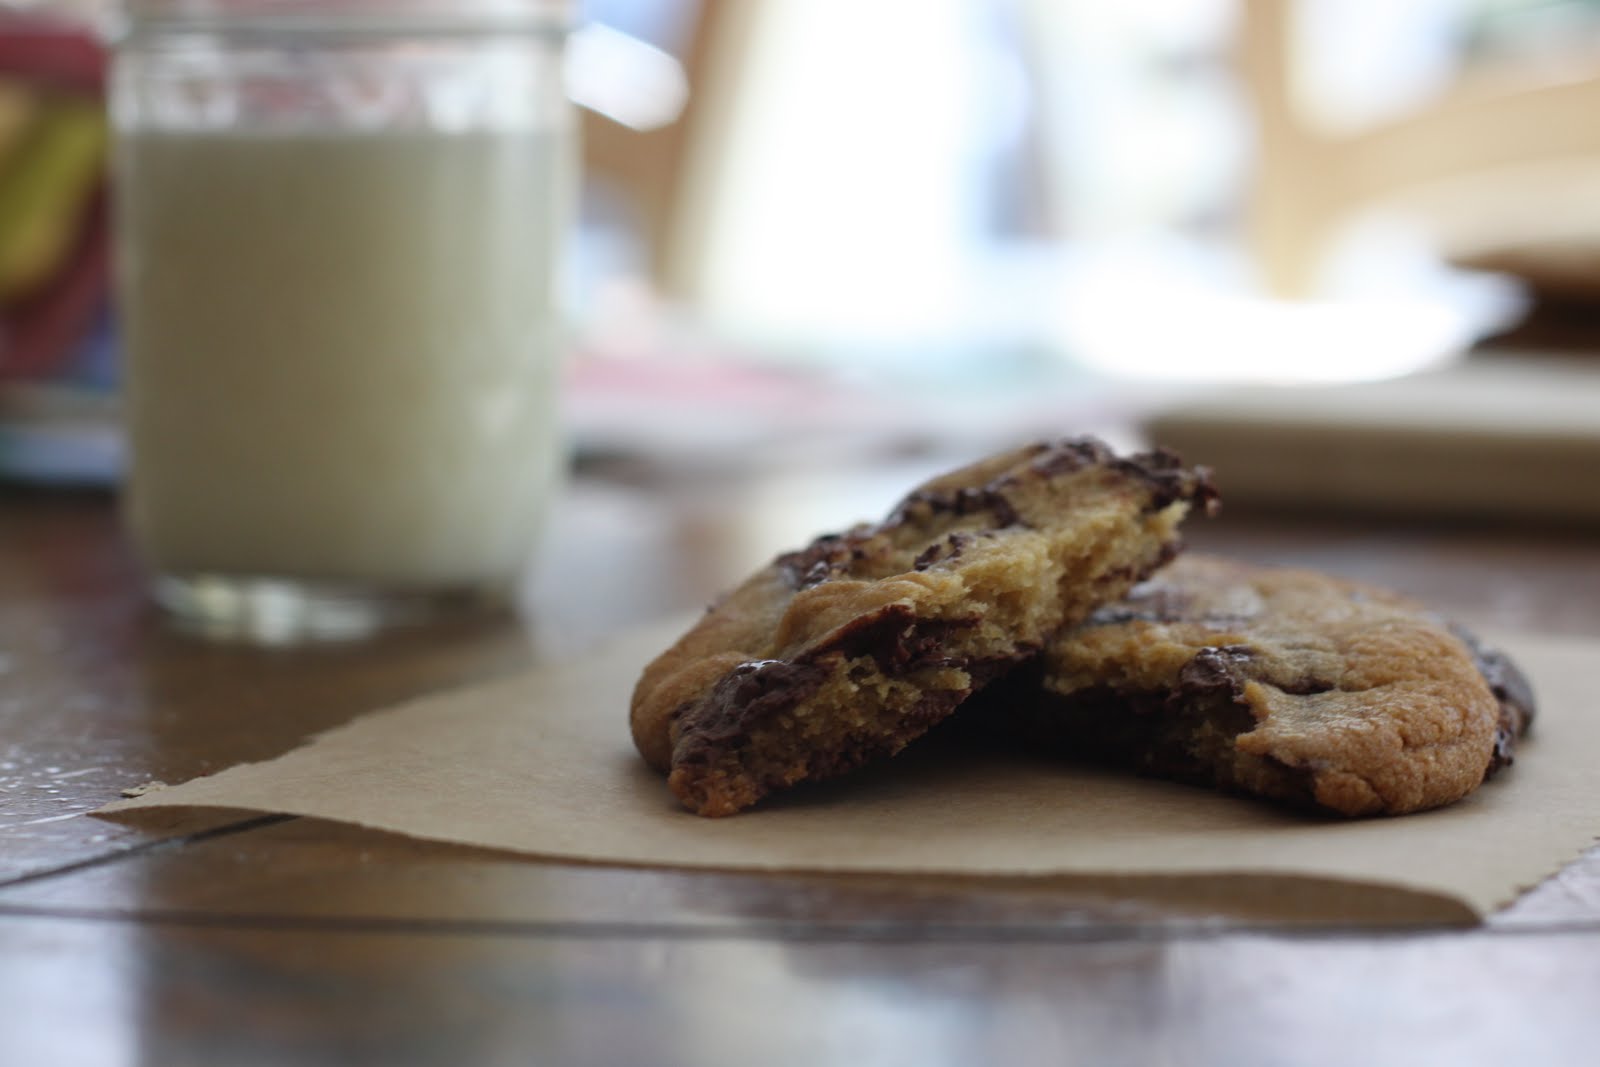
Ultimate Chocolate Chip Cookies
The key to these cookies lies in a few areas. The first is chilling the dough for at least 24 hours. This helps the flours absorb the eggs and lets the flavors develop. The second is the size. As I mentioned above this is the proper size to achieve the 3 texture rings in a cookie. However I think next time I may see what happens if I make them smaller - mostly because no one needs to eat a meal size cookie. The next is the bread flour and the last is the good quality chocolate disks as opposed to chocolate chips. Valrhona chocolate fèves (disks) can be found sold by the half pound in Whole Foods or in larger quantities online. I used the 70% cocoa but a minimum of 60% is fine as well. Right now I'm on the lookout for a locally-made small batch (preferably fair trade) company to use instead. Oh and I just want to point out the sprinkling of course salt (I used sea salt) over the cookies before baking them is important. It helps balance the sweetness and round out a more complex flavor.

Makes 18 5-inch cookies.

2 cups minus 2 tablespoons (8 1/2 ounces) all-purpose flour
1 2/3 cups (8 1/2 ounces) bread flour
1 1/4 teaspoons baking soda
1 1/2 teaspoons baking powder
1 1/2 teaspoons coarse salt
2 1/2 sticks (1 1/4 cups) unsalted butter
1 1/4 cups (10 ounces) light brown sugar
1 cup plus 2 tablespoons (8 ounces) granulated sugar
2 large eggs
2 teaspoons natural vanilla extract
1 1/4 pounds bittersweet chocolate disks or fèves, at least 60 percent cacao content
Sea salt

Sift flours, baking soda, baking powder and salt into a bowl. Set aside.
Using a mixer fitted with paddle attachment, cream butter and sugars together until very light, about 5 minutes. Add eggs, one at a time, mixing well after each addition. Stir in the vanilla. Reduce speed to low, add dry ingredients and mix until just combined, 5 to 10 seconds. Drop chocolate pieces in and try to incorporate them without breaking them. Press plastic wrap against dough and refrigerate for 24 to 36 hours. [Dough may be used in batches, and can be refrigerated for up to 72 hours.]
When ready to bake, preheat oven to 350 degrees. Line a baking sheet with parchment paper or a nonstick baking mat. Set aside.
Scoop 6 3 1/2-ounce mounds of dough (the size of generous golf balls) onto baking sheet, making sure to turn horizontally any chocolate pieces that are poking up; it will make for a more attractive cookie. Sprinkle lightly with sea salt and bake until golden brown but still soft, 18 to 20 minutes. Transfer sheet to a wire rack for 10 minutes, then slip cookies onto another rack to cool a bit more. Repeat with remaining dough, or reserve dough, refrigerated, for baking remaining batches the next day.

Thursday, August 12, 2010

Not my best idea.

If you had been in my kitchen last week, when I was grating up a zucchini, you probably would have said "Hey, putting zucchini in your chocolate chip cookies is not one of the best ideas you've ever had", and you know what? You would have been right. However, I had a lot of zucchini to use up when I stumbled across this recipe from Barbara Kingsolver's book Animal, Vegetable, Miracle (not one of the best books I've read either). The idea seemed interesting and I did want to get rid of that zucchini. She swears it's completely undetectable and even kid tested. I don't know what kids she's been feeding these to because, I have a high tolerance for odd, healthy things in my baked goods and I certainly taste the zucchini. That being said, I don't really mind it. It tastes like chocolate chip zucchini bread in the form of cookies. In fact, even the texture is fairly similar; A little too soft and cake-y for my taste (although some people like soft cake-y cookies so that's not necessarily bad). 

Would I make them again? Probably not. I don't actually like zucchini bread all that much. If zucchini bread is your favorite summer cake - these cookies were made for you. If you prefer to keep your vegetables out of your dessert, try making my favorite chocolate chip cookies and click here for an easy way to use up that zucchini.

Lucky for me, I have the best friends in the world (aka. hungry boys who will eat anything that fits the criteria 'free' and 'homemade' and most things that don't). Either they really did like them, or they are just good at being supportive because they ate every last one.

Zucchini Chocolate Chip Cookies
From Barbara Kingsolver's Animal, Vegetable, Miracle
Makes about two dozen

1 egg, beaten
1⁄2 cup butter, softened
1⁄2 cup brown sugar
1/3 cup honey
1 tbsp. vanilla extract 
2 cups whole wheat pastry flour
1⁄2 tsp baking soda 
1⁄4 tsp salt 
1⁄4 tsp cinnamon
1⁄4 tsp nutmeg
1 cup finely shredded zucchini 
12 oz chocolate chips Stir these into other ingredients, mix well. Drop by spoonful onto greased baking sheet, and flatten with the back of a spoon. Bake at 350°, 10 to 15 minutes.

Thursday, May 20, 2010

That's right, there's cereal in my cookies.

When you're moving cities it's important to eat all the things you are going to miss when you're gone. 

Wings from the Dugout... 

Ice Cream and Chicken from the Big Dipper...

It's important to go with friends... 

It's important to use up all the stray baking ingredients hiding in your kitchen...

It's important to do so by making absolutely delicious compost cookies... 
I'm a little late jumping on the compost cookie bandwagon but better late than never, right? I threw in chocolate, white chocolate, dried fruit, and cereal. That's right, there's cereal in my cookies. I also threw in cornmeal in place of some of the flour just because I could. Basically, if a cowboy cookie and a Momofuku Milk Bar Compost Cookie had a child, it would turn out like this. I called them compostin' cowboy cookies because of their mixed breed but really, all that matters is how they taste.
I actually wasn't expecting such a delicious result, because I usually like my cookies simpler, but I was pleasantly surprised. The crispy brown rice cereal gives an unexpected chewy crunch and you really can't go wrong with both dark and white chocolate. The raisins and dried cherries are good but you could easily replace them with nuts if dried fruit isn't your thing. 

Compostin' Cowboy Cookies 
Typically compost cookies have potato chips in them but I don't think potato chips really have much place in this world outside bars, BBQs and football games - plus I didn't have any at home. Pretzels on the other hand would definitely go over well because salty and sweet might just be the best combination out there. Feel free to throw in whatever you have on hand, salty, sweet, crunchy, chewy, whatever. I listed a few variations at the bottom. 
Makes about 27 large cookies 

225 g unsalted butter, at room temperature
250g turbinado sugar 
180g sucanat 
1 tbsp honey 
1 tsp vanilla extract 
2 eggs 
300g whole wheat pastry flour 
115g stone ground cornmeal 
2 tsp kosher salt 
1 tsk baking soda 
2 tsp baking powder 
200g dark chocolate chips 
200g white chocolate chips 
150g crispy brown rice cereal 
200g mixed raisins and dried cherries 

Stand mixer or electric hand mixer is must for these cookies. 

Beat butter, sugar, brown sugar and syrup for three minutes until fluffy. Add vanilla and eggs and beat for ten minutes. It will be very thick, and fluffy. 
Mix flour, salt, baking soda and baking powder in a separate bowl, and add this to the cookie batter. 
Stir as little as possible to combine them. 
Add your mix-ins and stir just to combine. 
Shape large balls -I used my 3 tablespoon cookie scoop - and place on greased baking sheets, leaving a lot of room in between. I fit five cookies per sheet. 
Bake immediately or refrigerate until ready to use. 
Bake at 350°F for 9-11 minutes. 
Important note: Let them cool completely on the sheet or they will fall apart. 

Other Variations: 
-Replace the cornmeal with additional whole wheat pastry flour 
-Replace the cornmeal with rye flour 
-Replace the sucanat with dark or light brown sugar (cookies will be sweeter with dark) 
-Replace the sucanat with dark or light muscovado sugar (cookies will be sweeter with dark) 
-Replace the turbinado sugar with white sugar or another refined or unrefined sugar 
-Replace the chocolate, white chocolate, cereal and dried fruit with 500-600g of whatever mix-ins you have on hand. Traditional Momofuku Compost cookies have some combination of potato chips, pretzels, and chocolate. Pecans, walnuts and/or mac nuts would be good. 
-Add 100-200g of shredded unsweetened coconut 
-More mix-in suggestions: Peanut butter chips, heath bar bits, m&m's, peanut m&m's, butterscotch chips, mini Rolos, mini peanut butter cups

Tuesday, May 4, 2010

Gluten-Free Almond Chocolate Chip Cookies

I think I need to take a computer course. Isn’t that ridiculous? Isn’t my generation supposed to be naturally computer savvy?

Unfortunately I seem to have missed out on the “computer genius” gene and I’ve been struggling with uploading pictures off my camera (among other things). The program just shuts down every time I plug in the camera. I feel like I spend at least 75% of my day troubleshooting cursing at my computer and it makes me want to unplug it, toss it out the window, and move to the country. 

Am I crazy or are there other people out there who feel like technology is sometimes frequently more trouble than it's worth? I feel really old and crabby saying that but it's true, I hate computers.

I'm very frustrated because I had this great post planned for you guys; with some pictures from my race on Saturday (my boat placed second), a few scenes from opening day at the farmer’s market (I bought 5lbs of honey), and these delicious cookies I made for my rowers. I've been putting off posting about these things since Saturday because I can't seem to get the pictures off my camera. At this point I didn't want to wait any longer to share these cookies with you, so I've decided to post without pictures and update when I'm finally able to load them.
Edit: I was able to get pictures of the cookies off my camera but now I'm having trouble again so no market pictures.
Gluten-Free Almond Chocolate Chip Cookies
Adapted from Elana's Pantry. Yields about 24 Cookies.

I'm not allergic to gluten, nor are any of the guys who I made these cookies for but I’ve been wanting to try baking almond meal for a while. Unfortunately, the only company available in Binghamton is Bob’s Red Mill and I’ve read only bad reviews about it (dry, crumbly etc) – plus it’s about  $10 a pound. The Trader Joe’s* brand, however, is significantly cheaper and has a much better texture. It is a meal and not a flour so its not very finely ground but it adds great texture to cookies or a sturdier cake – just don’t try to make angel food cake with it.

These have a softer chewier texture, more like an oatmeal cookie. I received nothing but positive feedback on them but I want to cut down on the fat content - 10g per cookie is a bit high for me but that's due to the almonds. Since I'm not concerned with keeping them gluten-free, I'm going to try replacing a small portion of the almond meal with whole wheat flour. If you want to maintain the gluten-free properties but still want to cut down on fat, I suspect oat flour would do the trick nicely. However, If you want to replace more than 1 cup of the almond meal, you'll also need to increase the oil to replace the fat lost from the almonds.

These cookies are only slightly sweet so if you prefer yours sweeter I would suggest using maple syrup instead of honey or even half syrup, half honey. The syrup will add a slightly different almost caramelized flavor.

2 ½ cups almond meal**
1/2 teaspoon baking soda

1/2 teaspoon salt

1/2 cup honey (see headnotes)
1/2 cup light olive oil
1 tablespoon vanilla extract

1/2 cup extra dark chocolate chips***

Preheat oven to 350F
Combine all ingredients, except the chocolate chips, in a medium bowl. Mix well. Mix in chocolate chips and refrigerate for 20 minutes. On parchment-lined baking sheet, drop round (generous) tablespoonfuls of dough, spacing 2 inches apart. If dough seems dry and rigid, flatten a bit. If you like ultra chewy cookies, flatten dough into discs before baking.

Bake for 7-9 minutes, until lightly golden (If you like crisper cookies, bake 9-10 minutes.). It's important to let them cool on baking sheet for a full 10-20 minutes to set, otherwise they will just fall apart.

Notes
*The last time I was on Long Island I got a little carried away at Trader Joe's since we don't have one in Binghamton - I think I bought something like 9 pounds of almond meal. Oops.

**Be sure to store an opened bag of almond meal in the fridge or even the freezer so that it does not go rancid from the fat.

***I've been hearing a lot of good reviews on Guittard chocolate so I bought a bag of their extra dark chocolate chips. The result? They were good, but i prefer the larger size and flatter shape of my usual Ghirardelli 60% Dark chips.

Friday, April 2, 2010

Black and White Cookies

I'm missing New York a bit today.
Black and White Cookies
I didn't have cake flour so I just used 100% all purpose flour. It worked okay, but my cookies were a bit lumpy instead of seriously smooth like Deb's. Some of the cookies I baked later on in the batch were smoother and thinned about better than the first few so I'm not entirely sure if the lumps and thicker cookies were a result of the flour or not but I would guess that it is. If you can get your hands on cake flour then definitely use it - if not, it will still work my way.

I used my large cookie scoop and it yielded about 20 very large giant cookies (the size of one you would buy in a deli).
Adapted from Smitten Kitchen

1 3/4 cups granulated sugar
1 cup unsalted butter (2 sticks), at room temperature
4 large eggs
1 1/2 cups milk
1/2 teaspoon vanilla extract
1/4 teaspoon lemon extract
2 1/2 cups cake flour
2 1/2 cups all-purpose flour
1/2 teaspoon baking powder
1/2 teaspoon salt
6 cups confectioners’ sugar
1/2 to 2/3 cup water
3 ounces very bitter or unsweetened chocolate
1 teaspoon honey
1 to 2 tablespoons unsweetened cocoa (to help achieve that dark black color)


1. Preheat oven to 375 degrees. Spray 2 baking sheets with nonstick spray, or line with parchment paper.
2. In large mixing bowl, combine sugar and butter. Mix by machine or hand until fluffy. Add eggs, milk and vanilla and lemon extracts, and mix until smooth.
3. In medium bowl, combine cake flour, all-purpose flour, baking powder and salt. Stir until mixed. Add dry mixture to the wet in batches, stirring well after each addition. Using a cookie scoop, place heaping spoonfuls of the dough 2 inches apart on the baking sheets. Bake until edges begin to brown, 18 to 20 minutes. Cool completely.
4. Boil a cup or so of water in a small pot. Place confectioners’ sugar in large, heat-safe mixing bowl. Gradually stir in enough boiling water to the sugar to make a thick, spreadable mixture. Err on the side of caution because a too-thin frosting is hard to undo. Leave remaining boiling water on the stove.
5. Spread frosting on half of the flat side of each cookie. Once all cookie halves have been frosted, place the bowl of the remaining frosting over the hot water and bring it back to a simmer (creating a double-boiler). Stir in the bitter or unsweetened chocolate until melted, as well as the honey. At this point, depending on the chocolate you used and your preferences, you might find the chocolate color to be a little lighter than the “black” of a black-and-white cookie. If so, I find that a tablespoon or so of cocoa mixed in darkens the color nicely.
6. Ice the remaining half of the cookies with the chocolate frosting. I find that the chocolate–especially with cocoa in it–is especially prone to getting too dry, so don’t worry about whisking in an extra teaspoon of that hot water from time to smooth it back into a shiny frosting.
7. Let the frosting set. Store in an airtight container. These cookies keep for a few days, but the texture will change a bit after day two. Personally I kind of like the way they taste a few days old. The frosting really sets and the cookie has a touch of "stale" texture - it reminds me of the real ones that I used to buy in the delis at home ;)

Wednesday, March 17, 2010

One Walnut Short of A Nutcase

I had to force myself to stop making cookie dough. After four batches, I had to stop making cookie dough, for no reason other than I'm out of containers to store it in. 

It was after 1AM but I was on a roll.

I only planned on starting a batch of ice cream, but after my late night run to the store for heavy cream (and back again for buttermilk), I worked myself into a little ball of anxiety thinking about how I would get everything done this week.

I spent all day obsessively planning my schedule for the next couple days; writing and rewriting, organizing and reorganizing my days, my recipes, my lists, my schoolwork, my thoughts. With each new edition I remembered something previously forgotten.

I'm g
oing have a house full of out-of-town guests this weekend, a
5K to bake for/setup/clean up/race, 2 birthdays to bake for/celebrate, a post-race party at my house and of course that nagging 10 page term paper that must get done before I trot off to South Carolina for spring training. I was quickly running out of days and with Tuesday rapidly coming to a close; I sat on my kitchen floor, surrounded by groceries, overwhelmed. That’s when it hit me. The only way I was going to calm myself down was to knock some things off my list. After sitting in class all day that paper was not happening, instead, I set to baking.
3 hours, 3 pounds of butter, 3 pounds of sugar, 3 pounds of flour, a quart of heavy cream and some whiskey later, I emerged from my little kitchen covered in flour, with a small glass of homemade Irish cream on ice. 


Well, I was definitely less anxious. Although, that may have had more to do with the Irish cream then the cookies. Now, you all probably think I’m one walnut short of a nutcase, and I'm sure to receive a concerned phone call from my mother, so let's get to the recipe I wanted to share today shall we?

Last year a friend of mine gave me his family’s recipe for Irish cream. It’s cool and creamy with a bit of a kick. This year, it’s been so warm that I decided to make ice cream out of it. You could even take it one step further and make some big chewy snickerdoodle cookies to go with it like I did. 


K-Tripp’s Irish Cream
You can find cream of coconut in the supermarket wherever they keep their margarita mixes and other bar mixers. It’s full of all kinds of chemicals and I had to buy a whole can that I’ll never use for anything else, so next time I will probably try using coconut milk instead. If you decide to go that route let me know how it works out. Makes about 750ml. 

3 large eggs*
1 can condensed milk (I used fat-free)
1 cup heavy cream
2 1/2 Tablespoons chocolate syrup
1 1/2 Tablespoons cream of coconut
1/4 cup whole milk (I used 1%)
1 1/4 cup rye or Irish whiskey (I used the scotch pictured because it's what I had at home)
Put everything in a blender and send it for a spin. Store in the fridge for up to 3 months.

*I buy my eggs from a local farm and I'm not worried about salmonella. The salmonella bacteria is actually on the shell and not in the egg anyway. As long as you wash your hands after handling the shells and before touching anything else, you should be okay. Did you know that farm fresh eggs don't actually need to be refrigerated unless you keep them for longer than a few days? I do want to point out however, this is a topic of contention among some and I'm not recommending you leave your eggs on your kitchen counter and then slurp a raw one down for breakfast. I do also want to add, you should make your own informed decision on whether or not you will eat raw eggs. This is simply my opinion and I take no responsibility if you eat a bad egg. Just sayin' ;).


Irish Cream Ice Cream
I don't like my ice cream too sweet but you can easily adjust the sugar to taste. I also just wanted a hint of Irish cream flavor use up to a 1/2 cup for a real kick. I wouldn't suggest anymore than that or it might not freeze well. The way it is now it freezes alright but melts quite fast. Makes about 6 cups.

2 cups heavy cream
2 cups 1% milk
2 teaspoons vanilla extract
3/4 cup sugar (I used a very generous 3/4 cup)
1/4 cup Irish cream

Heat the cream and sugar in a pot just to dissolve. Turn the heat off and add the milk, vanilla, and Irish cream. Pour in a bowl and chill comepletely (overnight works best). Freeze according to you ice cream maker's instructions.


Snickerdoodles
I used Smitten Kitchen's recipe with no alterations so you can just head on over there for the recipe.
I made them large with a 3T cookie scoop and flattened them before baking.


Live Activity Feed