Showing posts with label Pies and Tarts. Show all posts

Monday, July 5, 2010

To be a pie.

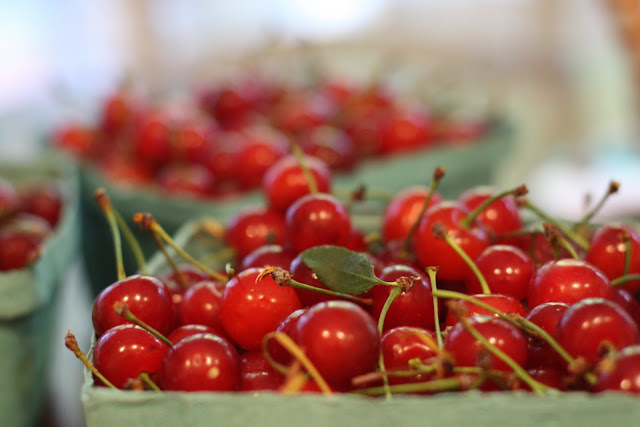
I ate about a kilogram of cherries on several occasions in both Armenia and Georgia and I really thought I was sick of them. That was before I came across tubs of sour cherries in the Union Square Greenmarket on friday. They were sleek, shiny red and mouth puckeringly tart. They just begged with every ounce of their little cherry souls to be taken home. They wanted desperately to be a pie so of course I bought several pounds and made one. 


After all, there's few things more perfect for a 4th of July beach party and bonfire. 


Sour Cherry Pie

You will have a little pie crust leftover but it freezes well and can be saved to make a small free-form pie or some mini turnovers. I replaced half of the flour with half whole-wheat pastry flour
Makes 1 10-inch pie


4 batches of Williams-Sonoma Basic Pie Dough, divided into 2 pieces for a bottom and top crust
5lbs pitted sour cherries
1-1/4 cups turbinado sugar
6 tablespoons cornstarch
a pinch of kosher salt
3 tablespoons cold unsalted butter cut into small pieces.
1 egg
Extra sugar for sprinkling on top

Preheat the oven to 425 degrees.
Prepare the pie crust according to the instructions.
Beat the egg and set aside.

Toss the cherries with the sugar, cornstarch and salt.
Pour the cherries into the bottom crust and scatter the butter pieces over the top.
Brush the edge of the crust with the egg and top with the second crust.
Pinch the edges and crimp with a fork.
Brush the top with the egg and sprinkle with sugar.
With a sharp knife, cut four steam vents into the top of the pie.

Bake for 15 minutes at 425 then turn the oven down to 375 degrees. Bake for another 50-60 minutes.
If the top or the edges begin to get to dark, cover them with tin foil.
Be sure to place a baking sheet on the rack below the pie to catch any juices that spill out.

Let cool at least a few hours before serving.

Saturday, May 22, 2010

What's Next?

I've been getting this question a lot lately. So much so that I just might scream. Obviously the thing to ask someone when they graduate college is what next? If I had a concrete answer, I may not dislike the question so much, but rambling on about lifeguarding, and wishful thinking about a move to Brooklyn in the near further doesn't really make a fantastic impression on people. Never the less, I'm sure you are all wondering the same thing and since Kate asked me the other day anyway, I might as well put the question to rest.

In June, I'll be traveling for 3 weeks through South Caucasus with a quick weekend in Hungary on my way home. After that, I'll be back in New York lifeguarding for the summer (hello tan) and looking for a real job - something with the (sustainable?) food industry, maybe a magazine or something developing/writing about recipes, basically whatever I can find. I'm also taking a web design class because there are so many things I want to do with this blog and I just have no idea how to do any of them.
Anyway, back to June and traveling because it's way more exciting than my lack of a job. I've been thinking for a little while how I'm going to handle this blog while I'm away. I will not have my computer with me, but my friend Jocelyn will. Internet, however, will be spotty. I also don't want to get too bogged down with it, so my posts will be sporadic. They will probably change from recipes to something more like a food review and of course pictures whenever I can. They may be cell phone pictures published directly from flickr, but hey, I do what I can.
Even though I have 2 memory cards, I'm going to have to dump the pictures off my camera at least once, so hopefully I'll have internet at that time and I'll post a few real pictures.
I've also added this neat little Current Location widget on the left side of this page so that you can see what city I'm in and follow my trip. I should be able to update this as well as twitter from my blackberry but, again, I'm not sure how much network coverage I will have. I guess what I'm trying to say is those three weeks will be a bit up in the air so just bare with me okay? Once thing I can promise is I will take a ton of pictures, eat lots of delicious things and share both with you when I return.
Now back to May, I have a completely unrelated recipe to share. I made this raspberry fruit tart last Saturday and it was quite a hit.
Before you write this off as a complicated tart with a fussy dough just read it through, I promise its so much quicker and simpler than you think.
I used my favorite french tart dough because it's beyond easy (read: no food processor, chilling, or rolling pin) and reliably delicious. It's recipe adapted from Paule Caillat of Promenades Gourmandes via David Lebovitz. I followed David's version exactly so I won't rewrite it, instead you can just click here

The most complicated part was the pastry cream, but really, even that was easy. I don't know why people make such a fuss about pastry cream. I did have a small panic attack when the I added the tempered egg mixture back to the heat and it became lumpy but, as soon as I took a whisk to it, it smoothed out nicely.


For the fruit you can really use any berry that you like or a combination of berries and kiwi. No apples or melon - that might be a little weird. I planned on doing mixed berries but at the last second decided on just red raspberries.
Lucky me, I had exactly 1/2 cup left of homemade red currant jelly that a friend (hi Sandy!) gave me earlier in the year. I used that for the glaze - don't you just love when things work out like that? I swear it makes my whole day.The pastry cream can be made a day or two in advance and stored in the refrigerator. Make sure to place saran-wrap directly on the surface of the pastry cream to keep a skin from forming. The tart shell can also be baked the day before, I stored mine in the tart pan, wrapped in saran-wrap, inside my covered cake platter. Whatever you do, do not fill and glaze the tart until you are ready to serve it. I had to put mine together about 3 hours ahead of time and it turned out fine, but I wouldn't suggest too much longer than that.


Raspberry Fruit Tart
Makes 1 9-inch tart

1 pre-baked french tart shell
1 batch pastry cream (see below)
2-3 pints red raspberries
1/2 cup red currant jelly

To assemble the tart: 
 Spread cold pastry cream over bottom of the cooled tart shell, using offset spatula or large spoon. Arrange fruit on top of the cream following a design if you like. I just filled every possible space with a raspberry.

To glaze the tart:
Bring jelly to boil in small saucepan over medium-high heat, stirring occasionally to smooth out lumps. When boiling and completely melted, apply by dabbing and flicking onto fruit with pastry brush; add 1 teaspoon water and return jelly to boil if it becomes too thick to drizzle. (Tart can be refrigerated, uncovered up to 3 or 4 hours). Remove outer metal ring of tart pan, slide thin metal spatula between bottom of crust and tart pan bottom to release, then slip tart onto cardboard round or serving platter; serve.


Pastry Cream
From Cooks Illustrated / Makes enough for 1 9-inch tart.
Chalazae are cordlike strands of egg white protein that are attached to the yolks—removing them with your fingers is easy and eliminates the need to strain the pastry cream after cooking. 

2 cups half-and-half
1/2 cup granulated sugar
pinch table salt
5 large egg yolks , chalazae removed (see headnote)
3 tablespoons cornstarch
4 tablespoons unsalted butter (cold), cut into 4 pieces
1 1/2 teaspoons vanilla extract

Heat half-and-half, 6 tablespoons sugar, and salt in medium heavy-bottomed saucepan over medium heat until simmering, stirring occasionally to dissolve sugar.

Meanwhile, whisk egg yolks in medium bowl until thoroughly combined. Whisk in remaining 2 tablespoons sugar and whisk until sugar has begun to dissolve and mixture is creamy, about 15 seconds. Whisk in cornstarch until combined and mixture is pale yellow and thick, about 30 seconds.

When half-and-half mixture reaches full simmer, gradually whisk simmering half-and-half into yolk mixture to temper. Return mixture to saucepan, scraping bowl with rubber spatula; return to simmer over medium heat, whisking constantly, until 3 or 4 bubbles burst on surface and mixture is thickened and glossy, about 30 seconds. Off heat, whisk in butter and vanilla. Transfer mixture to medium bowl, press plastic wrap directly on surface, and refrigerate until cold and set, at least 3 hours or up to 48 hours.
Tuesday, May 18, 2010

Black and Blue Berry Crisp

Well, it's over.
Graduation weekend came and went in a flurry of activity and far too much food. We had multiple BBQs some with family some without and I'm pretty sure I haven't cooked a proper meal in almost two weeks. I also can't remember the last time I ate anything leafy, healthy or salad-like. Instead I seem to have replaced my usual vegetable intake with large quantities of dessert. 
At least this one has fruit in it.

This crisp actually started out as strawberry-rhubarb pie, but it seems as though rhubarb is everywhere except Binghamton right now. That's okay because this was a lot less work and turned out to be quite popular at the BBQ I brought it to. In fact, I also made mini cannolis and a raspberry custard tart but the recipe most people asked for was this crisp. It's funny how different people can have such different opinions; personally I thought this was just okay, if not a bit boring, but I received so many compliments that eventually I promised to post the recipe. 

The top is similar to granola in flavor but I think part of my issue with it was the lack of crunch. I wanted crisp and flaky but instead it was softer and crumbly. Don't get me wrong it's good the way it is, but if you are after a crunchier result like I am, try replacing half of the flour with more oats. I can't promise that will solve it but that would be my next step. It probably wouldn't hurt to bake it a bit longer as well.
Black and Blue Berry Crisp
Taste your berries, if they are particularly tart toss them with a tablespoon of sugar. Mine were pretty sweet and I like them on the tart side anyway so I didn't bother.
You could easily leave the nuts out if you don't like them but I highly recommend keeping them. I used sucanat because it's what I had at home but I think dark muscovado sugar would work the best. If you don't have either of those you could easily replace it with dark brown sugar. I served it with fresh whipped cream because there was no freezer to store ice  cream. Either is delicious but we all know I prefer ice cream any day. If you serve it warm, you could also serve a pitcher of cold cream along side to drizzle over the top. 
If you plan to add the coconut, as I suggested in the body of this post, toss it together with all the dry ingredients - I would suggest about a 1/2 cup. Serves 12.

9 cups blackberries
5 cups blueberries
scant 2 tablespoons whole wheat pastry flour

2/3 cup chopped toasted pecans
2/3 cups slice almonds
1 1/4 cup old fashioned rolled oats
1 1/4 cups whole wheat pastry flour
3/4 cup sucanat or muscovado sugar
3 tablespoons raw sugar
1/2 teaspoon cinnamon
1/2 tsp salt

1 cup unsalted butter, cut into small pieces

Preheat your oven to 375 degrees.
Toast the nuts for 6 minutes, let cool and then chop course.
Mix the chopped nuts, oats, flour, both sugars, cinnamon, and salt.

Using a pastry blender, your fingers or a stand mixer fitted with the paddle attachment, work the butter in just until the mixture comes together in a crumbly texture. Keep chilled until ready to use. You could even make it ahead and store it in the fridge (up to a week) or freezer (up to 2 months).

When ready to bake the crisp, butter  (or spray with olive oil) a 9x13x2in baking dish and set aside. Toss the berries with 2 tablespoons flour and 1 tablespoon sugar if using. Pour into baking dish and spread out evenly. Cover with crumb topping and bake 50-60 minutes or until crisp is golden and fruit is bubbling. Best if served warm but still delicious at room temperature. You could also make the whole thing the morning you wish to serve it and reheat it in the oven right before serving. 


Of course, being the rowing obsessed bunch that we are; the BBQ took place at our boathouse, where we taught our families to row. To see more pictures from the weekend click here.


Saturday, March 27, 2010

My First Daring Baker's Challenge - March - Orange Tian

Since I started this blog I've noticed that once a month Tastespotting was swamped with a million variations of the same recipe. French macaroons, Nainaimo bars, Tirimisu, all sorts of labor intensive desserts that I would probably never make; mostly because I rarely have an occasion to make such fussy desserts. These aren't things I ever crave the way I do a good lemon tart, my favorite poundcake, a big bowl the whole pint of vanilla ice cream, a chewy chocolate chip cookie, or even just a dark, dark bar of chocolate. So why would I want to make something as rich as tirimisu when I'd be happier with a bowl of ice cream and raspberries? Exactly, I need an excuse; A reason to make them.
These once a month recipe explosions are a result of The Daring Baker's Challenge.  Every month a different daring baker hosts the challenge. This means they pick a recipe and write the guidelines. There are always certain components you must make but there is also some wiggle room for you to tweak it a bit, for you to make it your own. That's when it hit me; This is the perfect way to get myself baking outside the box. Nothing says accountability like a requirement to post your results for all of blog world to read.
I'm not going to lie, when I first read this month's challenge, I was skeptical to say the least. I wasn't upset about the amount of steps involved and I was actually pretty excited to make marmalade. It was just that an Orange Tian didn't really sound like something I wanted to eat. It didn't sound bad but it just didn't sound all that good either. Never the less I committed to this and I was not about to give up before I even started. Instead I picked a night to serve it and set out to buy my ingredients.
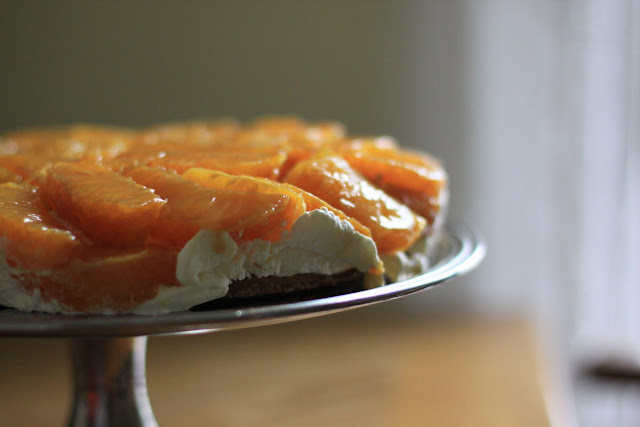
Well, I was dead wrong. I will definitely be making this again. The oranges were refreshing with the light, airy whipped cream, and the flaky crust at the bottom really brought the whole thing together.


Orange Tian
Ideally, you should have about 6 cookie cutters to build the desserts in and cut the circles of dough. The cookie cutters will be the size of your final dessert, so they should be the size of an individually-sized tart mold. I didn't have these so instead I used a 10-inch spring form pan without the bottom.


Preparation time:
Pate Sablee: 20 minutes to make, 30 minutes to rest, 15 minutes to roll out, 20 minutes to bake
Marmalade: 20 minutes to make, 30 minutes to blanch
Orange segments: 20 minutes, overnight to sit
Caramel: 15 minutes, overnight to sit
Whipped Cream: 15 minutes
Assembling: 20 minutes
Freezer to Set: 10 minutes

For the Pate Sablee:
2 medium-sized egg yolks at room temperature
6 tablespoons + 1 teaspoon; 2.8 oz; 80 grams granulated sugar
½ teaspoon vanilla extract
¼ cup + 3 tablespoons; 3.5 oz; 100 grams ice cold, cubed Unsalted butter
1/3 teaspoon; 2 grams Salt
1.5 cup + 2 tablespoons; 7 oz; 200 grams All-purpose flour
1 teaspoon ; 4 grams baking powder

Put the flour, baking powder, ice cold cubed butter and salt in a food processor fitted with a steel blade.
In a separate bowl, add the eggs yolks, vanilla extract and sugar and beat with a whisk until the mixture is pale. Pour the egg mixture in the food processor.
Process until the dough just comes together. If you find that the dough is still a little too crumbly to come together, add a couple drops of water and process again to form a homogenous ball of dough. Form into a disc, cover with plastic wrap and leave to rest in the fridge for 30 minutes.

Preheat your oven to 350 degree Fahrenheit.

Roll out the dough onto a lightly floured surface until you obtain a ¼ inch thick circle.
Using your spring form pan, cut out a circle of dough and place on a parchment lined baking sheet. Bake for 20 minutes or until circle is just golden.

For the Marmalade:
The marmalade was a bit sticky and chewy from the chunky orange rinds. I happen to really like candied citrus peels so it didn't bother me but if orange peels aren't your favorite, you just chop them up finer in a food processor before cooking down to a syrup.

¼ cup + 3 tablespoons; 3.5 oz; 100 grams Freshly pressed orange juice
1 large orange used to make orange slices
cold water to cook the orange slices

granulated sugar (use the same weight as the weight of orange slices once they are cooked)
Finely slice the orange. Place the orange slices in a medium-sized pot filled with cold water. Simmer for about 10 minutes, discard the water, re-fill with cold water and blanch the oranges for another 10 minutes.
Blanch the orange slices 3 times. This process removes the bitterness from the orange peel, so it is essential to use a new batch of cold water every time when you blanch the slices.
Once blanched 3 times, drain the slices and let them cool.
Once they are cool enough to handle, finely mince them (using a knife or a food processor).
Weigh the slices and use the same amount of granulated sugar .
In a pot over medium heat, add the minced orange slices, the sugar you just weighed, the orange juice and the pectin. Cook until the mixture reaches a jam consistency (10-15 minutes).
Transfer to a bowl, cover with plastic wrap and put in the fridge.

For the Orange Segments:
8 oranges.
Cut the oranges into segments over a shallow bowl and make sure to keep the juice. Add the segments to the bowl with the juice.
For the Caramel:
1 cup; 7 oz; 200 grams granulated sugar
1.5 cups + 2 tablespoons; 14 oz; 400 grams orange juice

Place the sugar in a pan on medium heat and begin heating it.
Once the sugar starts to bubble and foam, slowly add the orange juice. As soon as the mixture starts boiling, remove from the heat and pour half of the mixture over the orange segments.

Reserve the other half of the caramel mixture in a small bowl — you will use this later to spoon over the finished dessert. When the dessert is assembled and setting in the freezer, heat the kept caramel sauce in a small saucepan over low heat until it thickens and just coats the back of a spoon (about 10 minutes). You can then spoon it over the orange tians.
For the Whipped Cream:
Gelatin grosses me out a bit so for the stabilized whipped cream I simply beat the heavy cream with cream of tar tar. It may not have been quite as stiff as the gelatin version but it worked well enough.

1 cup; 7 oz; 200 grams heavy whipping cream
1 tablespoon of confectioner's sugar
1 tablespoon cream of tar tar

Fit a stand mixer with the whisk attachment. Whisk on high until stiff. Refrigerate for 20 minutes or up to overnight.


Assembling the Dessert:
Make sure you have some room in your freezer. Ideally, you should be able to fit a small baking sheet or tray of desserts to set in the freezer.
Line a small tray or baking sheet with parchment paper or a silicone sheet. Lay out 6 cookie cutters onto the parchment paper/silicone.
Drain the orange segments on a kitchen towel.
Have the marmalade, whipped cream and baked circles of dough ready to use.
Arrange the orange segments at the bottom of each cookie cutter. Make sure the segments all touch either and that there are no gaps. Make sure they fit snuggly and look pretty as they will end up being the top of the dessert. Arrange them as you would sliced apples when making an apple tart.
Once you have neatly arranged one layer of orange segments at the bottom of each cookie cutter, add a couple spoonfuls of whipped cream and gently spread it so that it fills the cookie cutter in an even layer. Leave about 1/4 inch at the top so there is room for dough circle.
Using a butter knife or small spoon, spread a small even layer of orange marmalade on each circle of dough.
Carefully place a circle of dough over each ring (the side of dough covered in marmalade should be the side touching the whipping cream). Gently press on the circle of dough to make sure the dessert is compact.
Place the desserts to set in the freezer to set for 10 minutes.

Using a small knife, gently go around the edges of the cookie cutter to make sure the dessert will be easy to unmold. Gently place your serving plate on top of a dessert (on top of the circle of dough) and turn the plate over. Gently remove the cookie cutter, add a spoonful of caramel sauce and serve immediately.

Live Activity Feed