Showing posts with label Onions. Show all posts

Saturday, October 16, 2010

Sauteed Purple Cabbage with Apples and Red Wine

Have you ever wondered why a cabbage is so heavy? Its because that homely crucifer has far more layers tightly wound inside than you could ever imagine. Seriously, I cut up a medium-sized purple cabbage on sunday, sauteed it, served it to several guests and ate it every day for 3 to follow. I STILL have leftovers. The good news is it goes with everything. 


The first two days we ate it with pan seared poultry sausages, the next day I ate it as a cold salad with hard-boiled eggs and finally we mixed it into our butternut squash soup for dinner one night - that was Chris' idea and I'm not sure I ever want to eat that soup without it now.

I'll get to the soup recipe later but for now go buy a purple cabbage and break out the dutch oven.


Sauteed Purple Cabbage with Apples and Red Wine

I served this with pan-seared chicken sausage from Brooklyn Cured
Serves a small army

olive oil
I medium size head of purple cabbage, sliced into ribbons
1 small or medium yellow onion sliced into thin ribbons
about 1 cup red wine
balsamic vinegar
hot pepper flakes
salt
pepper
ground sage
2 bay leaves
2 golden delicious apples sliced into thin sticks

Heat a large dutch oven over medium high heat and add a glug of olive oil.
When the oil is hot add a pinch of hot pepper flakes and the onion. 
Sautee until softened, about 1 minute.
Add the cabbage, and red wine and stir to coat. There should be extra liquid at the bottom of the pot.
Add a splash of balsamic, 2 bay leaves a teaspoon or 2 of ground sage and a hefty pinch of kosher salt. 
Stir and cover.
Let the cabbage cook down and soften stirring occasionally, about 10 minutes or so. Add more wine and/or balsamic as needed to keep just a little liquid at the bottom.
Once cabbage is just about cooked add the apple slices and a few grinds of black pepper
Cook uncovered until the apple is softened and most of the liquid is absorbed.
The cabbage should be tender and not to tough but not totally mushy either.
Remove bay leaves and serve with pan seared sausage or pretty much anything else.

Saturday, September 18, 2010

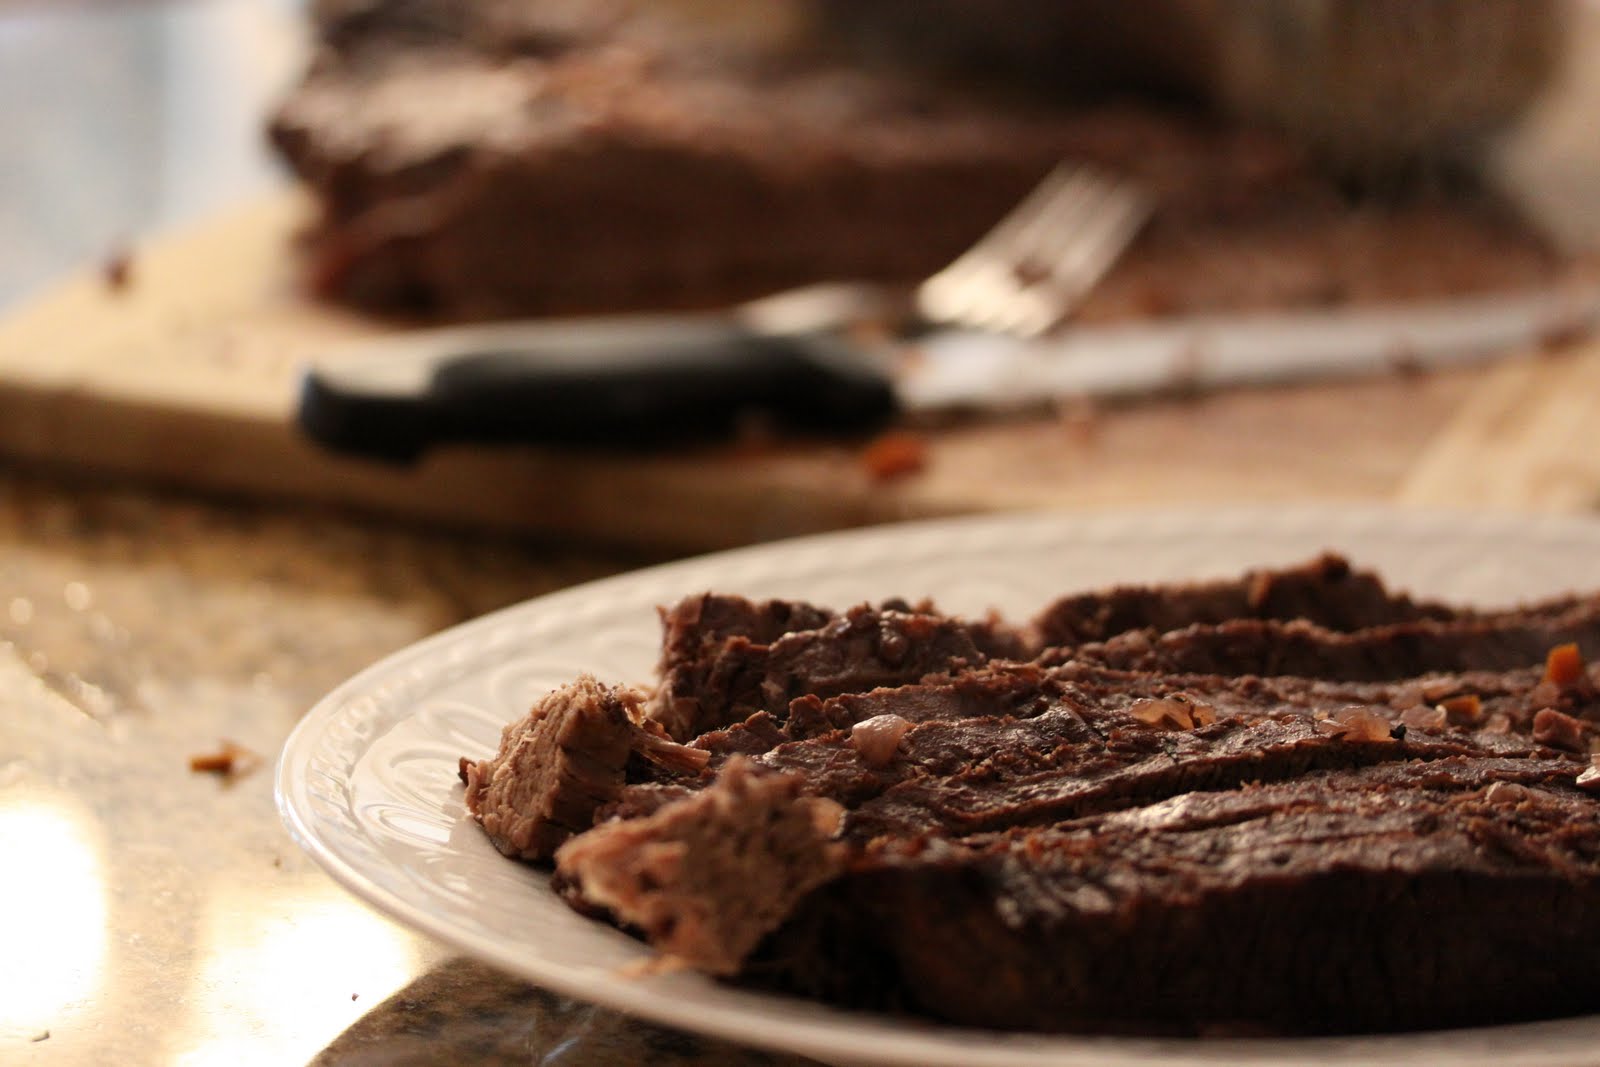
Brisket and "Goop"

Everyone has a few household items or foods that they call by an odd name. Maybe it originally descended from a family member who speaks another language or maybe one day someone was at a loss for words and just made one up that stuck. Whatever the reason, the words become a natural, integrated part of your vocabulary and you forget that the general population doesn't have a clue what you are talking about (I actually do this fairly frequently). For example the first time I heard someone use the slang term "po-po" to refer to the police I was utterly confused because in my family, we called the end of a loaf of bread the "po-po". I was probably 16 and the conversation went something like this:


Friend: There's a tree blocking the road we can't go into town: but don't worry the po-po is on their way, it'll be cleared soon.
Me: Wait, what? Who's coming?
Friend: The po-po, to deal with the fallen tree.
Me: The end-of-the-bread is going to clear the tree from the road??
Friend: What are you talking about? The police are coming; po-po = police.
Me: Ohhhhhh, well not in my house it doesn't...
Or try sitting in your freshman dorm in college with a roommate that you barely know and asking her to pass the doo-hickey (TV remote or sometimes whatever it is that you want but can't seem to remember the name of, at which time you point and call it a doo-hickey).
Yea, I got a weird look for that one.
Sometimes, the real word just doesn't fit the item or food as well as the made-up word. In that case it's best to carry on as if the whole world calls it that same thing. Most likely no one will question you and in some cases they'll understand why it's so fitting. For example, the word "goop". Growing up in my house, this referred to the mixture of chopped vegetables, wine and broth that a brisket roasted with in the oven. They're finely chopped and kind of soupy, floating around next to the meat. After the brisket is done roasting (for 3 1/2 hours) the chopped vegetables get strained out of the sauce and plopped into a bowl to be served along side the meat and sauce. The words "chopped vegetables" just don't seem to fit. It's still a little liquid-y and the little bits are kind of uniformly sized, honestly I just can't think of any word for it besides "goop" and that's what has stuck all these years.
However, last night I served it to a table full of people who didn't grow up with brisket "goop" and every time someone asked me what was in the bowl, I was at a loss for words. Somehow explaining what exactly is in it just doesn't do it justice. I feel like the only way to really describe it is "goop" and eventually that's what I started telling people. I said it as if it were the most natural thing in the world and no one questioned it. I even got a few nods as if I had given them the answer they were expecting all along.


Beef Brisket with "Goop", Baby Carrots and Pearl Onions
Beef broth lends a deeper richer flavor but either chicken broth also works. Any combination of the two is fine as well. / Serves 8

1 3.5lb Flat-cut beef brisket, fat trimmed
3 tablespoons olive oil
7 cups (900g) finely chopped onions
1 cup finely chopped onions
1 cup finely chopped celery
2 tablespoons finely chopped garlic
1 750ml bottle dry red wine
8 large fresh thyme sprigs
1 tablespoon finely chopped fresh thyme
2 bays leaves
13 cups low-sodium chicken or beef broth

1lb baby carrots
12oz pearl onions, blanched and peeled

Preheat oven to 450 degrees
Sprinkle meat with salt in pepper
Heat 2 tablespoons oil in a large, wide pot of medium-high heat.
Brown brisket - about 5 minutes per side - and transfer to a large roasting pan. Set aside.
Add chopped onions, garlic, celery and carrots to the original pot and saute until golden, about 10 minutes.
Add wine, thyme sprigs and bay leaves to pot. Boil until liquid is reduced to about 5 cups, about 10 minutes. Add both and bring to a boil.
This is a TON of liquid but it will reduce significantly and you definitely need all of it to ensure there is enough liquid throughout the whole cooking time.
Pour wine mixture over brisket to fill 2/3 of the pan, reserve remaining wine mixture.
Roast brisket uncovered until very tender, turning and basting occasionally and adding more of the wine mixture as necessary to keep the pan 2/3 full, about 3 1/2 hours.
Remove the meat to a cutting board or platter.
Strain pan juices into a bowl pressing on solids and set aside. 
Remove the time sprigs and bay leaves and discard.
*Puree the solids (aka the vegetables or "goop") until blended but still chunky and spoon into a bowl. Gradually whisk a little of the puree into the gravy adding more as needed to thicken but not too much as the gravy will continue to thicken on its own. If you accidentally add too much just whisk in a little broth to thin out again.
Season both sauce and "goop" with salt and pepper and set aside.
Thinly slice the meat across the grain.

Heat 1 tablespoon oil in a large frying pan over medium high heat. Add baby carrots, pearl onions and 1 tablespoon chopped fresh thyme; saute until golden, about 5 minutes. Cover and cook until vegetables are crisp-tender, about 5 minutes. Season with salt and pepper.

Serve meat with sauce, "goop" carrots, and pearl onions.
The meat, sauce and "goop" freeze well either separately or mixed together into ready to go portions.


*I completely forgot this step last night which is why my sauce was too thin and my "goop" just looks like chopped up vegetables. It's not a huge deal but it's definitely worth the extra step.

Monday, August 23, 2010

On the topic of favorites.

adj.
1. Of, relating to, or typical of country life or country people.
2. a. Lacking refinement or elegance; coarse.
     b. Charmingly simple or unsophisticated.
3. Made of unfinished or roughly finished wood
4. Having a rough or textured appearance

I'm happy the summer is almost done. There I said it. I know there are summer-lovers everywhere shaking their heads and wagging their fingers at me but that's okay. Autumn really is my favorite season. I feel like I say that about every season as it's looming, just waiting to descend on us, but this time I really mean it. Autumn is the best. Actually, the only thing better might be late-August because the entire months of September, October and November are still to come. Plus August means tomatoes. 

So. Many. Tomatoes. 
This in turn means tomato sauce. 
So. Much. Sauce.

Now, I know what you're thinking; who wants to peel all those tomatoes? Well I have two words for you: don't bother. Thats right, ignore all those cookbooks that insist you must peel and seed your tomatoes, forget that fussy ice bath, and just toss your chopped up tomatoes right into the pot. It does yield a pretty chunky sauce, but I like it that way. If you prefer a smoother more uniform result, just quickly take a stick blender and smooth it out. Some might call this the lazy way to do it but I'm going go ahead and call it rustic - which by the way, while were on the topic of favorites, might just be my favorite word. 

So here it is, the most charmingly simple, unsophisticated tomato sauce. Now you have no excuse for buying that jarred red goop that wishes it were pasta sauce.


Rustic Tomato Sauce
This is more of a guide then a recipe, there really are no right or wrong measurements. If you don't like onion, use less; If you really like onion, use more. You get the idea, feel free to play around with the proportions and don't be afraid to taste it as it cooks. There is no need for sugar here because of the sweetness from the carrot and grape tomatoes. Be generous with the salt, it will round out the flavor. Tomatoes can be quite costly from a supermarket even when they are in season however this can be a very inexpensive recipe if you seek out ingredients from your local farmer's market or better yet the actual farm. Makes about 1 quart of sauce.

Olive oil
1 medium yellow onion, chopped
1 small head of garlic, chopped
1 carrot, chopped in large chunks
~3 pounds Roma tomatoes, chopped course
1/2-1 pint grape tomatoes, sliced in half
2 tablespoons tomato paste (I like Brad's organic)
garlic powder
onion powder
dried oregano
juice of 1/2 a lemon
sea salt or kosher salt
freshly ground pepper
fresh basil and parsley, chopped course

Heat a large pot or dutch oven over medium-high heat.
Add a swig of olive oil and wait for it to heat up.
When a drop of water makes the oil splatter, add the onion and carrot. Saute until onion is softened then add the garlic. Turn the heat down to medium and continue to saute, stirring occasionally, until the onion is translucent. Be careful not to let the garlic burn.
Next add the chopped tomatoes and grape tomatoes. Cover and turn the heat up to high. 
The tomatoes will begin to release their juices and break down. When a liquid starts to form add the tomato paste, a few large pinches of dried oregano and a couple shakes of each garlic and onion powder. Stir to combine, turn the heat down to a simmer and replace the cover.
Let simmer until the tomatoes have mostly broken down, add salt and pepper to taste. Stir in the lemon juice and replace the cover. Continue to simmer covered (about an hour and half or two hours from the time you added the tomatoes.
Taste and adjust the salt and pepper.
If you want a smoother sauce, blend it at this point with a stick blender or in a regular blender (this can be dangerous with very hot liquid so be careful). You can choose to blend it just part of the way leaving some chunks or smooth it out completely. I chose not to blend it at all. (If you go this route remove the carrot - I ate it right out the pot and burnt my tongue). If you put the sauce through the blender return it to the pot.
Add the coarsely chopped basil and parsley. Stir to combine, cover and cook another couple minutes.
Spoon sauce over pasta, use as a hot bruschetta on thick, crusty slices of bread or freeze it in ball jars for later use. Relish all the time you saved not peeling your tomatoes.

Saturday, August 21, 2010

Pickle Failure

It seems like everyone has pickle story. Some have long been singing the praises of all-things-fermented or brined and some are just learning to like them but never-the-less, recipes are popping up everywhere.

If you follow me on flickr, you saw my pickles in their early stages. Plump, kirby cucumbers - nestled together with spices - working hard to ferment themselves. What you did not see coming (and neither did I) was the mold. That's right, I pulled my pickles out a week ago only to discover a thick layer of fuzzy mold on top of a thin egg-white-looking layer blanketing the top of my pickles (too much information?).

I peeled up the mold and examined my pickles to see if they were okay underneath the white layer - they weren't. They were soft and squishy and definitely not something I wanted to eat. Sigh. 
Finally, I dumped the whole jar and sent an email to Shannalee to see if she could figure out what I did wrong. We both decided that I let them ferment for too long (two weeks). I also read numerous sites that said to put the jar in a dark place while they ferment - which is what I did and I think that helped the mold along as well. Oh well.

I bought another bunch of cucumbers from the same farm and started a new jar. This time I put them on the counter where I could keep an eye on the sneaky little mold-producers and I only let them sit 6 days.
This afternoon, I pulled one out, cut it open and took a bite.

I hate to say it, but I was disappointed. They are just barely pickled yet the tops of one or two are already slightly soft and threatening to turn to mush. Leaving them out to ferment a bit longer is not an option...I can sense them just daring me to leave them one more day so they can grow that thick mold again. Gross. So my question for you is, what now? Am I expecting too much from a pickle without vinegar? Maybe this is how they are supposed to taste. I don't know, I guess I'll try again.

These fussy, little, good-for-you bacteria better get it together or I'm going to ditch them for their better-tasting cousin, yogurt. We're already good friends anyway.

Failed (or not?) Lacto-Fermented Pickles
Adapted from Food Loves Writing

Pickling cucumbers
Water
Kosher Salt
Caraway Seeds
Whole Black Peppercorns
1/2 of a white onion, peeled and chopped in large chunks
3 garlic cloves, peeled

Fill a quart size mason jar about a quarter or a third full with water, and add two tablespoons of sea salt, 1 tablespoon of caraway seeds, 1 tablespoon of black peppercorns, three garlic cloves and the onion chunks. Add in cucumbers, as many as will fit comfortably, and then fill the rest of the jar with water, leaving a little room at the top. Cover and set on the counter for 5 to 8 days (I left mine for 6). Put them in the refrigerator when they are done fermenting or when you sense they will turn moldy if don't. 
Hopefully yours turn out better than mine!

Tuesday, August 17, 2010

Lisa's Rainbow Black Bean Salad


Lisa's Rainbow Black Bean Salad
I made this salad up based on the brightly colored rainbow peppers I found at the farm stand last week. After I served it at a bar-b-que Sunday night I had a few requests for the recipe so I thought I would post it here. If you can't find rainbow peppers, replace them with a mix of red, yellow and orange bell peppers. Cilantro would also be a nice addition here if you have it on hand.
Serves 4-6

15oz cooked black beans (or 1 can rinsed well)
2 small rainbow peppers, diced small
½ small onion, diced small
1 large handful blanched string beans, chopped into 1-inch pieces
1 large scallion - green and white part, chopped
fresh flat leaf parsley, chopped course

Juice of one lime
1 tablespoons olive oil
1 teaspoon ground cumin
3/4 teaspoon salt
1/2 teaspoon honey
⅛-¼ teaspoon cayenne pepper 
fresh flat leaf parsley, chopped course

Whisk the lime juice, oil, cumin, salt, honey, and cayenne pepper in a large bowl
Add the remaining ingredients and toss to combine.
Refrigerate at least one hour to let the flavors combine.
Salad will keep for 3 days in the refrigerator.

Wednesday, April 21, 2010

Getting used to the idea.

Everywhere I turn someone likes to point out that I only have 11 days of classes and 3 weeks until I graduate. Whoa.  

Put another way that's 38 hours at my internship, 11 days of class, 3 weeks, 3 short assignments, 1 take home final, 1 online final, 3 regattas, 1 banquet, 2 excessively long ceremonies, 1 BBQ, and 1 camping trip until I'm done with this city. Whoa. 

I guess I'm ready for it. When all is said and done I actually do like Binghamton, but I'm kind of done here.  A new city would be nice, one on the west coast maybe, or Boston or of course good old New York City. Preferably Manhattan but I'll settle for Brooklyn. I don't actually have a job so I guess I'm headed back to Long Island, back to my Dad's house. Sigh. At least it's free...and I don't have to clean it.
Actually, I've been getting used to the idea - just for the summer. It won't be so bad, there is a backyard where I can plant tomatoes, herbs, lettuces, spinach, cucumbers and whatever else I can fit into the dirt; and I'll have time, lot's of time. Time to row, time to run, time to apply for jobs that I actually want, and of course time to write.

Oh writing, I haven't felt like doing very much of it lately. I've been cooking, sometimes even taking pictures of what I make but it hasn't been the same. I haven't been motivated to create an attractive plate or set up a shot. I haven't been in the mood to carry my camera with me; In fact I haven't really felt like taking pictures of anything at all. Mostly, I've just been tired

Cooking and baking is like stress relief for me, but sometimes blogging takes away that release. When I know I have term papers and presentations to write, when I'm on the computer all day, that's when I want to focus on the soothing noises of a skillet sizzling, the whir of my KitchenAid or the feeling of warm water rushing over my hands. That's when I don't want to be distracted by having to stop for photographs or write about a recipe when I'm done. I probably don't want to spend any extra time on the computer, I don't want to sort through pictures and I most definitely don't want to organize my thoughts. Instead I want to go outside, I want to ride my bike, I want to do yoga and I want to read in the grass. I want to let other people do the talking, the writing. I want to just listen, read - take in someone else's thoughts.

With that finally out in the open, there are things I have made that I haven't told you about; like this delicious un-photographed cheesecake that I made at 1am Saturday morning, as a last minute dessert for Saturday night. There were also various salads and a new favourite yogurt mixed with poppy seeds and blueberries (on multiple occasions). There were more nights out than I really wanted, and more five minute meals than I generally like, but then there was also a BBQ at my house. A BBQ for which I made turkey burgers.

Turkey Burgers with Feta and Parsley
I came up with this recipe a few summers ago and I've been making them frequently ever since.
Makes 4 Burgers.

For Burgers:
1lb 99% lean ground turkey
1/2 of a small white onion, chopped fine
2 oz Feta
1 handful fresh parsely, chopped
garlic powder, salt, and pepper to taste

For Serving:
whole wheat hamburger buns (I like Martin's Whole Wheat Potato Buns or make you're own Brioche Buns)
1/2 of a small white onion sliced in rings
arugula
mustard
sour pickles

In a large bowl, mix all of the burger ingredients  until combined. Shape into 4 burgers and grill until cooked through. Serve on a bun with arugula, onion and mustard or over a salad. 

Burgers can be frozen raw to be grilled at a later date, no need to defrost first just leave on the grill a few minutes extra. Cooked burgers are also good cold the next day over salad.

Wednesday, April 14, 2010

April Daring Cook's Challenge - New Brunswick Stew

Kitchen shears are my new favorite utensil.
Why are they my new favorite utensil?  Well, I was having a wrestling match with a 3lb chicken and it was winning - until I remembered the kitchen shears. The beautiful, sleek, seriously sharp kitchen shears. They sliced right through those chicken bones with ease and grace as if to say why have you been struggling with this for the better part of 20 minutes? Weakling.
Lesson one: Don't underestimate the kitchen shears.
Lesson two: Read a recipe before you buy the ingredients - or you could just do what I did.
I bought all my ingredients (so I thought), set aside a night to cook and serve the meal, and of course, left no time for errors or extra runs to the supermarket. Then, just as I went to start cooking at 4:30 Monday afternoon, I realized I should have bought 3lbs of chicken breasts, some quantity of 3 other meats, lima beans and a can of whole peeled tomatoes. I had none of the above, but I did have plenty of homemade chicken stock in my freezer. I thought for a few minutes, decided I would cut my chicken into pieces, use the ground sirloin that I already had defrosting and just flat out make my own recipe. I know I was supposed to use one of the two recipes provided by the Daring Cook's Host but I was out of time and options. I made it up as I went and it came out quite good. Hopefully the Daring Kitchen police won't be too angry. 

Not-Even-A-Little-Bit-Traditional Brunswick Stew

New Brunswick Stew is a modern adaption of Brunswick Stew (squirrel stew). It replaces squirrel with rabbit and also includes several other meats like pork and chicken. I've eaten rabbit once before but I've never cooked it. Unfortunately, there is no butcher in Binghamton and short of killing your own that's the only place you'll find rabbit meat. I did check Wegmans just in case but when I asked if they could order it for me, the kid working behind the meat counter looked at me as if I was seriously disturbed. The answer was obviously: no crazy lady, we don't sell cute, furry, backyard animals. I even tried to get a friend to hunt one for me. He hunts plenty of deer and other animals but declined on the rabbit citing them as too cute and furry. By this point I officially felt like a horrible, soul-less person trying to kill cute and furry animals. I gave up and went with chicken and beef.


 I used homemade BBQ Sauce because Jason made 7 quarts of of it from the Dinosaur BBQ cookbook. In case you are wondering 7 quarts is a TON of BBQ sauce and we've been doing everything short of drinking it to try to use it all up. I encourage you to use the Paul Purdome Chicken Seasoning because it really is the best. I use it on everything but if you can't find it you can replace it with hot paprika, salt, pepper, garlic powder, and onion powder. Serves 6-8

1 onion
2 leeks chopped
1 lb boneless chicken breast
1 lb chicken thighs (bone-in)
1 lb lean ground sirloin
4 cups chicken broth (I used homemade)

Paul Purdome chicken seasoning 
red cayenne pepper
2 bay leaves

28oz butter beans
1 14oz can diced tomatoes in juice
1 1/2 cups spicy BBQ sauce (see headnote)
1 pound frozen green peas
10oz frozen baby corn


A few tablespoons flour (I used whole wheat pastry but white is fine)


kosher salt
pepper

In a large dutch oven (mine is 5 1/2 quarts), sauté the onion and leeks in olive oil until just soft
add the chicken and season generously with chicken spice. Cook about 5 minutes, flipping the pieces half way through.
Remove chicken to a plate and set aside.
Add ground sirloin to the pan and cook until just brown but not cooked through
Add chicken back to the pan
Add chicken broth, bay leaves, and a dash of cayenne pepper.
Cover and bring to boil.

Cook for about 25 minutes until chicken is cooked through and easy to shred.
Remove chicken pieces and shred the meat. Remove the drumstick and thigh bones and return shredded meat to the pot.
Add beans, BBQ sauce and diced tomatoes.
Simmer uncovered for about 20 minutes.
At this point it will still be pretty thin.
Put a few tablespoons of the flour in a small bowl and whisk in about 1/4 to 1/2 cup of liquid from the pot. When the mixture is smooth stir it back into the pot and continue to simmer uncovered for about 10 minutes. If it's still too thin repeat the process and simmer for another few minutes. 
Remove the bay leaves and throw them out.

At this point I covered it and turned off the heat for about a half an hour to wait for my friends to come over. This step isn't necessary but it did help thicken it up a great deal. 

If you skip this step then just stir in the peas and corn, cook until both are hot and serve.
If you choose to let it sit like I did, add the peas and corn and bring it back to simmer until heated through.
Serve with a good chunk of crusty bread. The leftovers store well in the fridge and freezer and taste even better the second day.

Live Activity Feed